|
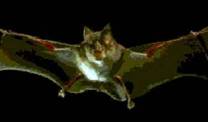
All the info you need to understand our furry little friends. |
|
BATS, BATS EVERYWHERE! |


|
PROVIDING AN ALTERNATIVE ROOST |
|
Bat-proofing has two potential drawbacks. One is that exclusion can be stressful for a maternity colony. When prevented from using their usual roost, the bats may move into a nearby building, where they may be expelled again, or even exterminated. Also, research has shown that displaced colonies will not relocate into buildings that already house other maternity colonies. In other words, an excluded colony cannot just move down the road into a barn or church that already has bats. If a displaced colony cannot find a new roost, it may leave the area. In fact, researchers have found that expelling bat colonies can contribute to serious declines in local bat populations.
A second drawback is that homeowners may find it difficult to bat-proof their home completely. Bats can crawl through cracks as small as 1/2 by 1-1/4 inches, so persistent bats may find a way to reenter their former roost.
Bat boxes can solve both of these problems because they provide alternative roosting sites for maternity colonies. When constructed properly, bat boxes can serve as suitable places for females to raise their pups. With bat boxes, the bats get a safe roosting site outside the home, while homeowners benefit from the bats' control of insects.
Figures 5 and 6 (illustrated at the end of the document) show two plans for building a bat house. A handsaw, hammer and staple gun are the only tools required for the beginner's bat house. This house can accommodate 50 or more bats. The small nursery house can house a colony of 150 bats.
Beginner's bat house (12" x 12" x 8")This bat box is useful when attracting bats to an area. It may be accepted by male bats or nonreproductive females. It is not large enough for most bat colonies. Please see figure 5 (at the end) for an illustration.
Parts list · Front 11-1/4" x 12", 3/4" exterior plywood or board · Back 18" x 12", 3/4" exterior plywood or board · Sides 11-1/4" x 7-3/4", 3/4" exterior plywood or board · Top 8-1/2" x 12", 3/4" exterior plywood or board · Baffles 1/4" lightweight plywood 3 - 10" x 10-1/2" (slightly wider if using routed grooves) 2 - 11" x 10-1/2" · Spacer strips: 10 - 1" x 10" board strips Construction1. After cutting out pieces, use a knive or saw to roughen interior surfaces with horizontal scratches or grooves 1/4" to 1/2" apart. 2. If you use a router to cut grooves for baffles, cut 1/4" grooves into side pieces at 1" intervals. 3. Otherwise, attach two spacer strips to inside of front piece with nails or screws. Attach baffles and spacers alternately, making sure that baffles and strips fit tightly against the sides of the box when it is assembled. 4. Assemble box as shown, using glavanized finishing nails or exterior-grade screws. Do not use wood glue. Caulk joints. 5. Apply latex paint or stain to exterior of box. Do not paint or stain the interior. Staple roofing paper onto the top, front and sides of the house, extending it about 6 inches down from the top. This will create an important temperature difference in the box between the top and the bottom.
Small nursery house (12" x 24" x 8")This bat box is suitable for small to medium-size summer maternity colonies. It should be installed in the spring. Please see figure 6 (at the end) for an illustration.
Parts list · Front 11-1/4" x 24", 3/4" exterior plywood or board · Back 18" x 24", 3/4" exterior plywood or board · Sides 11-1/4" x 7-3/4", 3/4" exterior plywood or board · Top 8-1/2" x 24", 3/4" exterior plywood or board · Baffles 1/4" lightweight plywood 3 - 10"x 22-1/2" (slightly wider if using routed grooves) 2 - 11" x 22-1/2" · Spacer strips: 10 - 1" x 10" board strips
Construction1. After cutting out pieces, use a knive or saw to roughen interior surfaces with horizontal scratches or grooves 1/4" to 1/2" apart. 2. If you use a router to cut grooves for baffles, cut 1/4" grooves into side pieces at 1" intervals. 3. Otherwise, attach two spacer strips to inside of front piece with nails or screws. Attach baffles and spacers alternately, making sure that baffles and strips fit tightly against the sides of the box when it is assembled. 4. Assemble box as shown, using glavanized finishing nails or exterior-grade screws. Do not use wood glue. Caulk joints. 5. Apply latex paint or stain to exterior of box. Do not paint or stain the interior. Staple roofing paper onto the top, front and sides of the house, extending it about 6 inches down from the top. This will create an important temperature difference in the box between the top and the bottom.
IMPORTANT THINGS TO REMEMBER…
Not every bat house will be used. Bats are particular about the design and location of their living quarters. Bat nurseries should have a stable temperature of 80 to 110 degrees, depending on the species. Thus, the house should be made as airtight as possible. Seal all external joints with caulk to prevent heat loss.
Bats are sensitive to chemicals. Do not use treated wood and do not paint or varnish the interior of the house. To make it easier for the bats to secure a good foothold use rough lumber and place the rough sides inward. You may also cut 1/16-inch grooves to help the bats climb and roost. The roosting partitions can be covered with fiberglass insect screening or 1/4-inch hardware cloth to help young bats secure a footing.
Western red cedar is the recommended construction material because it withstands outdoor exposure. Houses also can be built of redwood or cypress. However, construction can be simplified by using exterior plywood.
To help ensure constant temperatures in the bat house, orient the house to receive maximum sunlight, particularly during the early morning. Houses will remain warmer if they are facing south. Europeans sometimes mount four houses in a group, each facing a different direction to provide a range of temperatures for the bats. You may paint the house a dark brown or black using a flat, latex paint to increase heat absorption.
Bat houses should be erected 10 to 15 feet above the ground. They should be protected from the prevailing (north and west) winds. Never place a house where the entrance is obstructed by tree limbs or vegetation. An excellent site for a house is on an old building. Bat houses placed within 1/4 mile of a permanent water source also are more likely to attract bats.
Bats typically will not occupy a house right away. Many bat houses are not used the first year they are erected, and some may never be used. However, by ensuring the house is correctly built and properly located, most bat houses will eventually be used. |


|
- THE TRADITIONAL BAT HOUSE |
|
**Please note** Information, materials lists, plans, etc. were obtained from the following website: http://extension.missouri.edu/explore/agguides/wildlife/g09460.htm. |
|
CLICK HERE to go back to previous page |